I have tried many editors over the years. WebStorm, NeoVim, Zed. The pattern was always the same: powerful editor, enormous configuration overhead, plugins that break on updates, and a feeling that I am spending more time configuring my tools than actually writing code.
Then I tried Helix. After about a week, I knew I was not going back.
This post is part of my terminal workflow series.
The philosophy that clicked
Helix does one thing that changed my entire workflow: it ships with everything a developer needs, built in, configured by default, ready to go.
No plugin manager. No 500-line config. No hunting through GitHub for the right extension to get basic functionality working. You install Helix, point it at your project, and it just works. LSP support, tree-sitter syntax highlighting, fuzzy file picker, diagnostics, code actions, rename refactoring, auto-completion, and more.
This is not a stripped-down editor pretending to be minimal. It is a fully-featured code editor that made the deliberate choice to include what developers actually need in the core, rather than outsourcing everything to a plugin ecosystem.
What is built in (and why it matters)
Here is what you get out of the box, with zero configuration:
Language Server Protocol (LSP) - Install a language server (e.g. typescript-language-server via Homebrew), and Helix automatically connects to it. Go to definition, find references, rename symbols, code actions, hover docs, diagnostics. All just work. No lspconfig plugin, no mason.nvim, no debugging why your LSP client is not connecting.
Tree-sitter - Every language gets proper syntax highlighting, text objects (select inside function, select around class), and syntax-aware selection expansion. No installing parsers manually.
File explorer - As of version 25.07, Space+e opens a built-in directory tree. Before this, the file picker (Space+f) was already fast enough that most people did not miss a sidebar. Now you have both.
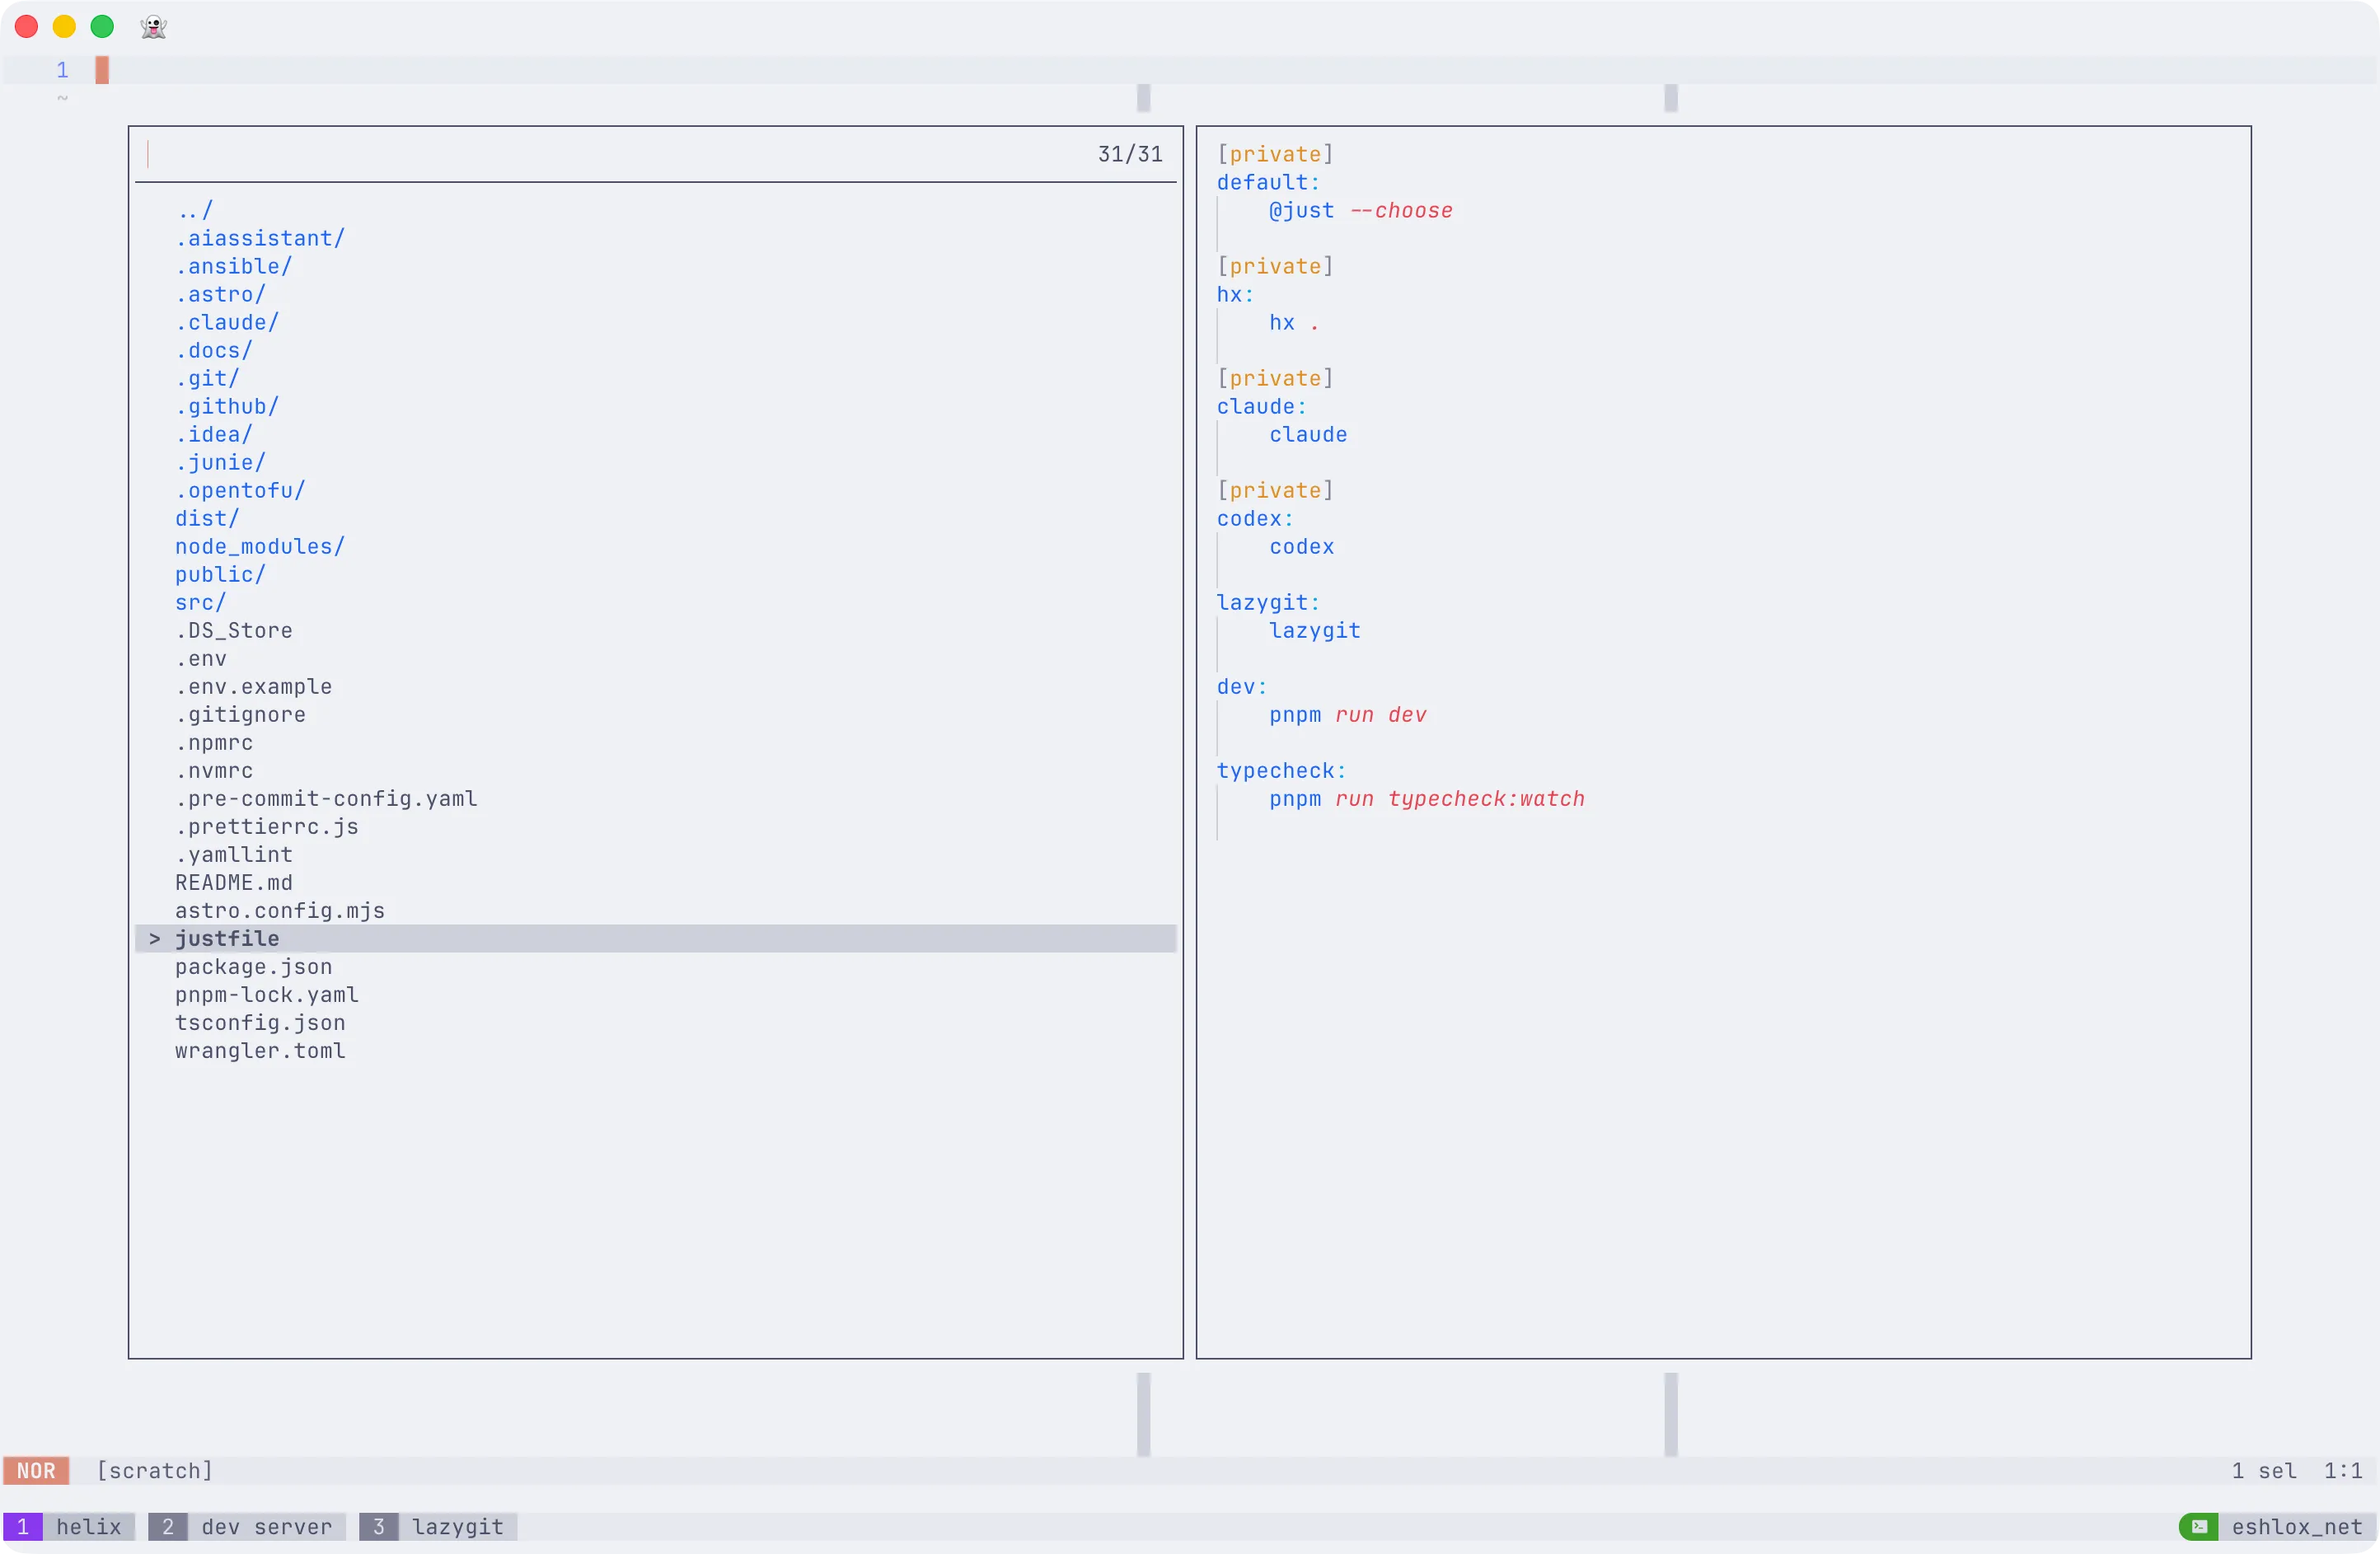
Fuzzy pickers for everything - Files (Space+f), buffers (Space+b), symbols (Space+s), diagnostics (Space+d), global grep (Space+/), command palette (Space+?). These are not plugins. They are part of the editor.
Multi-cursor editing - This is the Helix superpower. Select a block, press s to find a pattern within it, and every match becomes a cursor. Edit them all at once. It replaces 90% of what you would use find-and-replace or macros for, and it is more intuitive than either.
Auto-completion - Works out of the box with LSP. No cmp plugin, no snippet engine configuration. It just shows up when you type.
Select-then-act - This is the core paradigm shift from Vim. In Vim, you say “delete inside braces” (di{). In Helix, you first select inside braces (mi{), see exactly what is selected, then delete (d). It sounds like a small difference, but it eliminates an entire class of “oops, that was not what I meant to delete” moments. You always see what you are about to act on before you act.
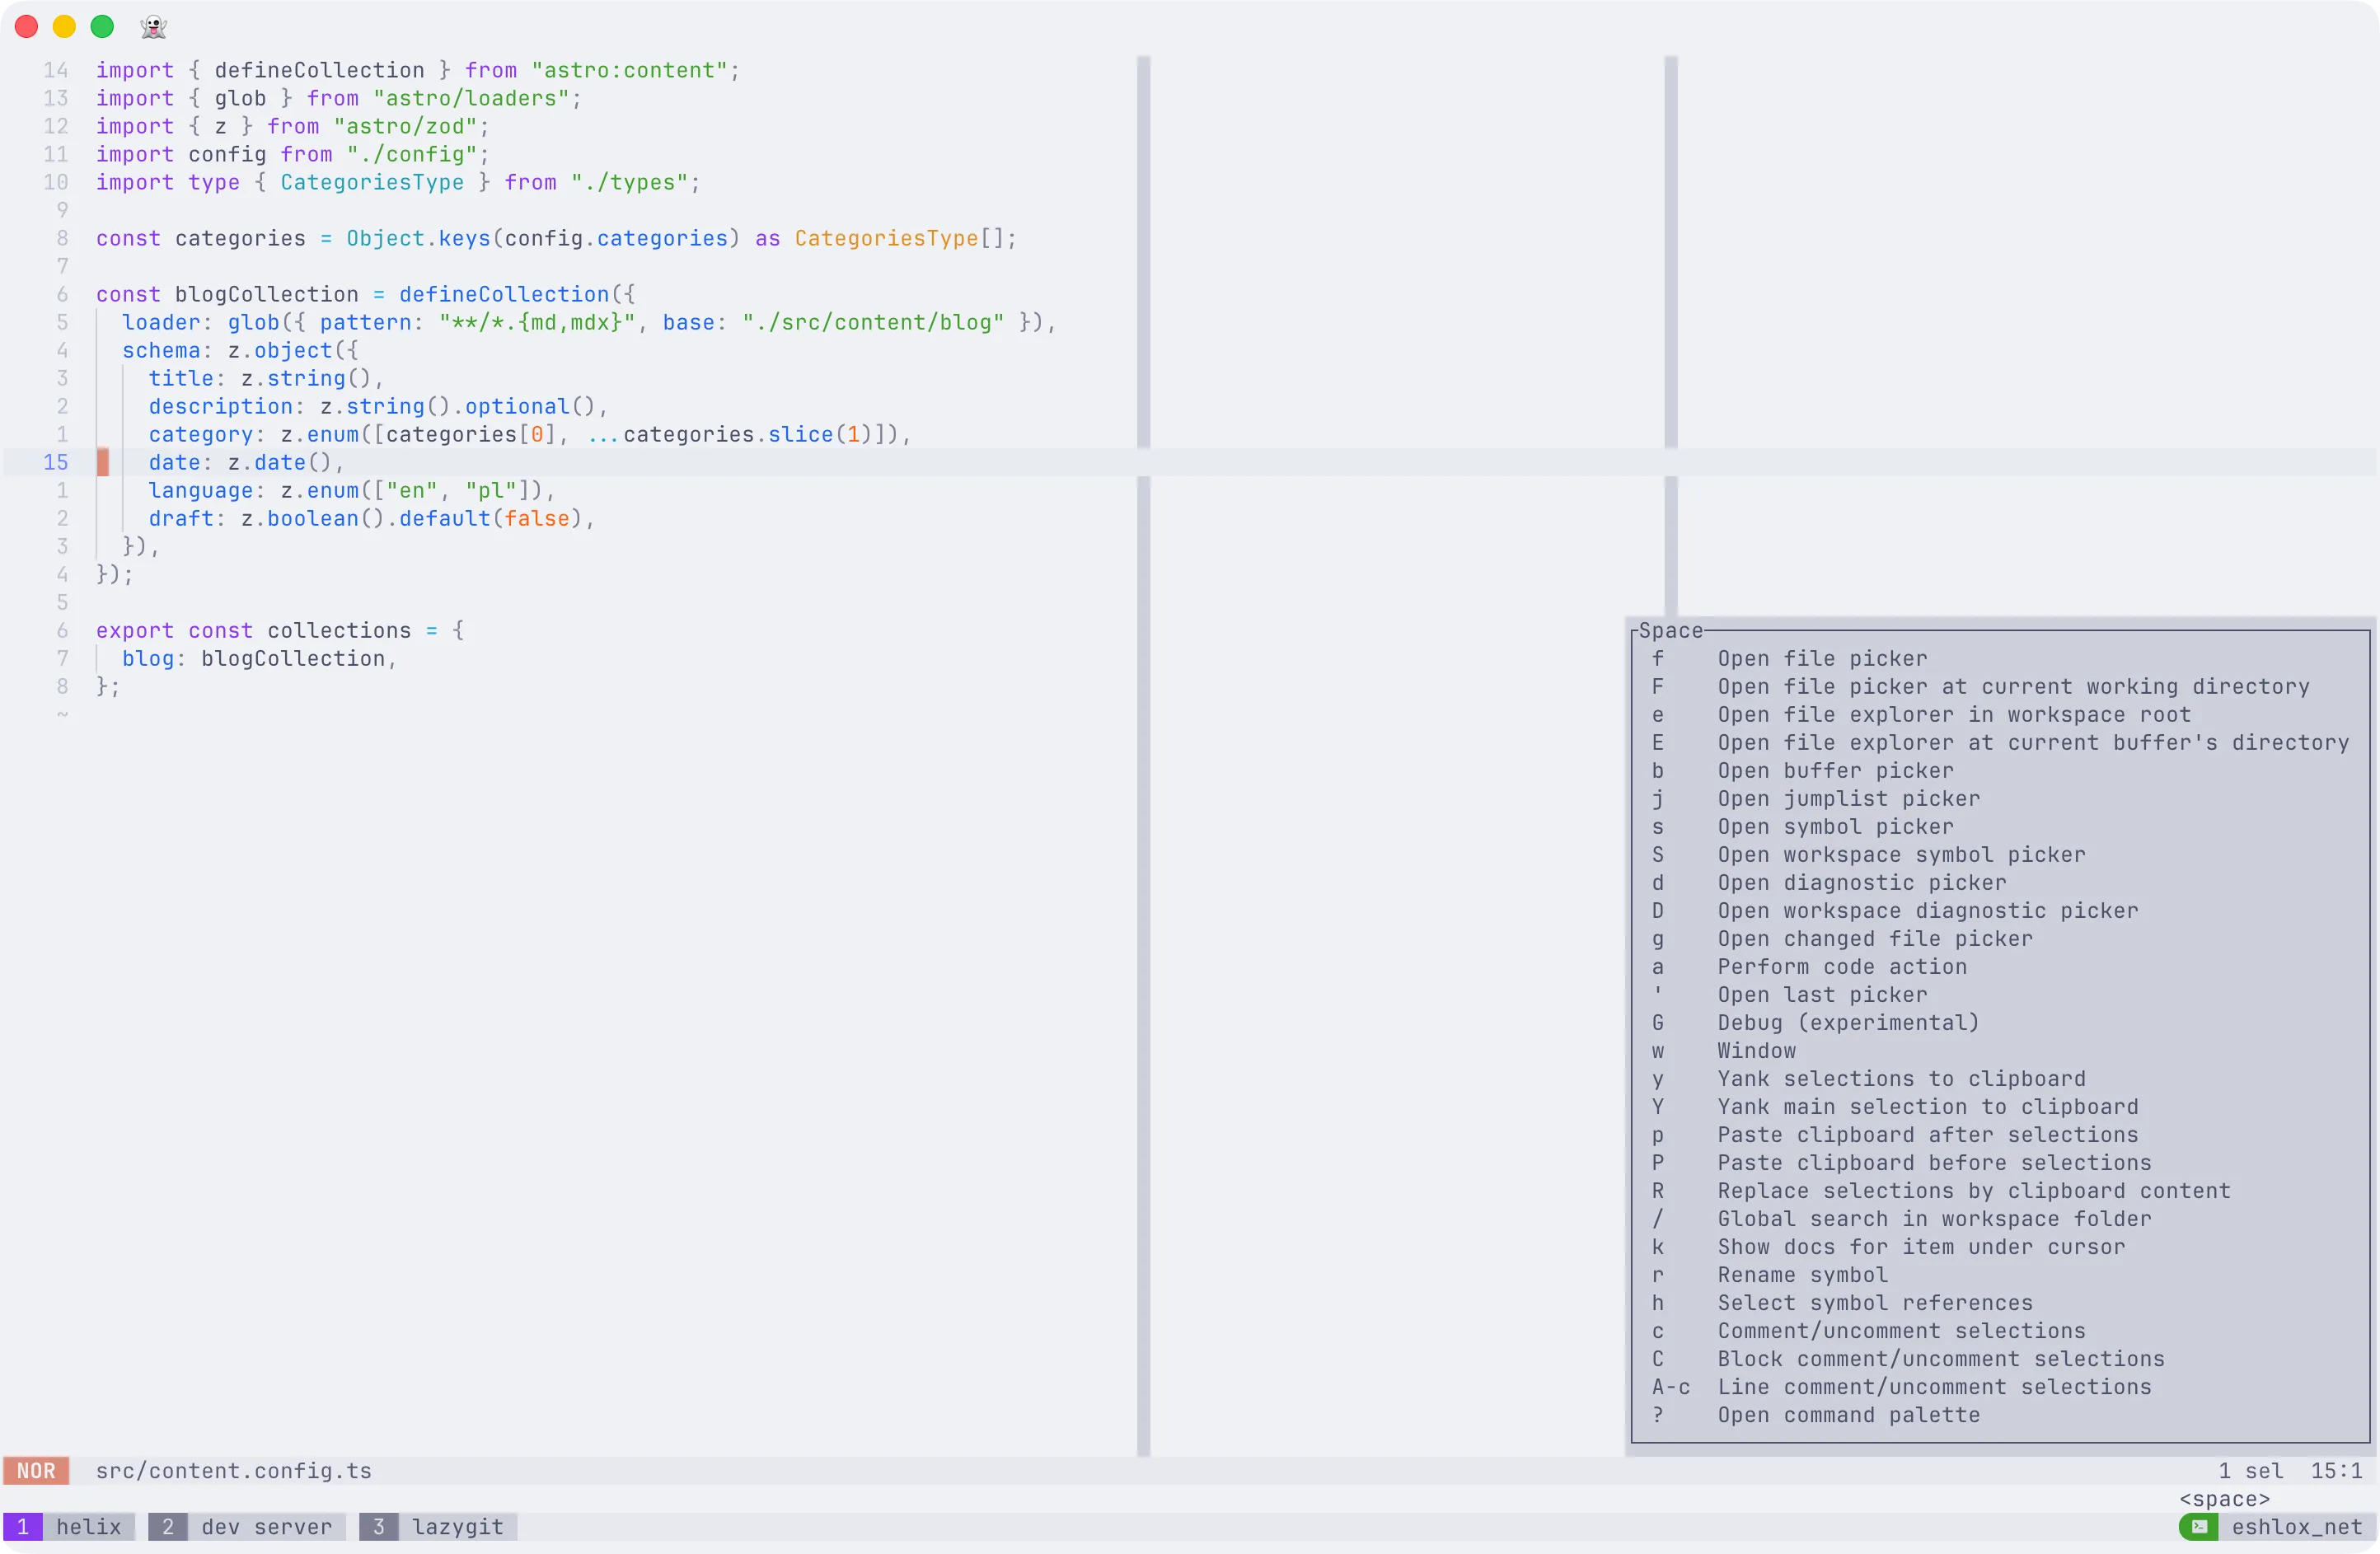
Informative menus - Press g and a popup shows you every g command. Press m and you see all match options. Press Space and you see the full leader menu. You do not need to memorize anything to get started. The editor teaches you as you use it.
An editor that knows its place
Here is the thing that really sold me: Helix is a code editor, and it is only a code editor.
It does not try to be a terminal emulator, a file manager, a git client, or a project management tool. It edits code. It does that extremely well. And it lets other tools do what they do well.
My workflow looks like this:
- Ghostty for the terminal emulator
- tmux for session management, window switching, persistence
- Helix for code editing
- lazygit for git operations
- Claude Code / Codex as AI assistants in separate tmux windows
Each tool does its job. Helix does not need a built-in terminal because tmux gives me persistent, scriptable terminal sessions that survive crashes. It does not need a git plugin because lazygit is better than any editor integration. It does not need a file manager sidebar because Space+f and Space+e cover everything.
This separation is not a limitation. It is a feature. When Claude Code modifies a file in another tmux window, I switch to Helix and press Ctrl+r to reload. When I need to check server logs, I switch tmux windows. Each tool stays focused and reliable.
Configuration: 30 lines of TOML
Here is my entire Helix config. Compare this to the hundreds of lines (or thousands, with plugins) that NeoVim typically requires.
~/.config/helix/config.toml
theme = "catppuccin_latte"
[editor]line-number = "relative"mouse = truecursorline = trueauto-format = trueauto-save = truebufferline = "multiple"color-modes = truetrue-color = truerulers = [80, 120]idle-timeout = 50
[editor.cursor-shape]insert = "bar"normal = "block"select = "underline"
[editor.statusline]left = ["mode", "spinner", "file-name", "file-modification-indicator"]right = ["diagnostics", "selections", "position", "file-encoding"]
[editor.lsp]display-messages = truedisplay-inlay-hints = false
[editor.indent-guides]render = truecharacter = "▏"
[editor.soft-wrap]enable = true
[keys.normal]"C-s" = ":write""C-q" = ":quit""C-/" = "toggle_comments""C-r" = ":reload-all"
That last line ("C-r" = ":reload-all") is important when working with AI coding tools. Helix does not auto-reload files changed on disk (yet, it is a long-standing feature request). When Claude Code or Codex modifies files in another tmux window, Ctrl+r refreshes everything instantly. One keypress, all buffers updated.
The auto-format = true line in [editor] is the global switch that makes format-on-save work. Without it, even if you set auto-format = true per language in languages.toml, saving will not trigger the formatter. This tripped me up initially.
~/.config/helix/languages.toml
[[language]]name = "typescript"auto-format = trueformatter = { command = "prettier", args = ["--parser", "typescript"] }
[[language]]name = "tsx"auto-format = trueformatter = { command = "prettier", args = ["--parser", "typescript"] }
[[language]]name = "javascript"auto-format = trueformatter = { command = "prettier", args = ["--parser", "babel"] }
[[language]]name = "jsx"auto-format = trueformatter = { command = "prettier", args = ["--parser", "babel"] }
[[language]]name = "json"auto-format = trueformatter = { command = "prettier", args = ["--parser", "json"] }
[[language]]name = "css"auto-format = trueformatter = { command = "prettier", args = ["--parser", "css"] }
Helix auto-maps .mjs and .cjs to javascript, so those are covered. If you need a non-standard extension, you must provide the full file-types list. It replaces the defaults rather than appending to them.
LSP setup: one-time, hassle-free
If you use fnm (or nvm) to manage Node versions, do not install language servers with npm install -g. Each Node version has its own global node_modules, so switching versions makes your globally installed tools “disappear.”
Install through Homebrew instead:
brew install typescript-language-serverbrew install prettierbrew install vscode-langservers-extracted # HTML/CSS/JSONbrew install tailwindcss-language-server # if you use TailwindThese live in /opt/homebrew/bin/, completely independent of your active Node version. Helix finds them automatically. No path configuration needed.
Verify everything works:
hx --health typescripthx --health javascripthx --health tsxYou will see checkmarks for the language server, formatter, and tree-sitter parser. The only red mark will be the debug adapter (DAP). Ignore it. DAP in Helix is barely usable and almost nobody uses it.
One thing to note: typescript itself must still be in your project devDependencies. The language server uses the local version from node_modules for type checking. What Homebrew provides is just the server binary that Helix talks to.
Working with AI coding tools
This is where the tmux + Helix setup really shines. My typical project workspace looks like this:
Session: myproject ├── 1: helix (hx .) ├── 2: claude (Claude Code) ├── 3: codex (Codex) ├── 4: lazygit (lazygit) ├── 5: dev (pnpm run dev) └── 6: typecheck (pnpm run typecheck:watch)I switch between windows with Option+1 through Option+6. You can set up sessions like this manually with shell helpers, or automate it with tmuxinator.
The key insight: Claude Code understands tmux. If I add this to my project CLAUDE.md:
## tmux layout
Single tmux session with windows:
- window 1: helix (editor)- window 2: claude (this window)- window 3: codex- window 4: lazygit- window 5: dev server- window 6: typecheck
To read output from dev server:tmux capture-pane -t 'myproject:5' -p -S -30
Claude Code can then check if the dev server is running, read error logs from the typecheck window, and even restart processes, all by executing tmux commands from its own window. No special tooling needed. Just tmux doing what tmux does.
After Claude modifies files, I switch to the Helix window and press Ctrl+r. Everything reloads. Back to editing.
What is missing (honestly)
No editor is perfect. Here is what Helix does not have:
No auto-reload. Files changed externally are not automatically refreshed. This is the single most-requested feature, open since 2021. The Ctrl+r keybinding is a workable solution, but native file watching would be better.
No plugin system (yet). It is being developed using Steel (a Scheme dialect), and there are early prototypes. But as of today, you can not extend Helix with third-party plugins in the stable release. For me this is actually a positive because everything I need is already built in. But if you need something niche, it is not there.
No inline terminal. You can run shell commands with :sh, pipe selections through commands with :pipe, but there is no split-pane terminal inside the editor. This is by design. Helix expects you to use a terminal multiplexer like tmux.
The :tutor command
If you are new to Helix, run :tutor inside the editor. It is an interactive tutorial that walks you through the core concepts: selection, movement, editing, multi-cursor. It takes about 15 minutes and it is the fastest way to build muscle memory.
For a full keyboard shortcut reference, see the Helix cheatsheet.